Author: omahahandyman1

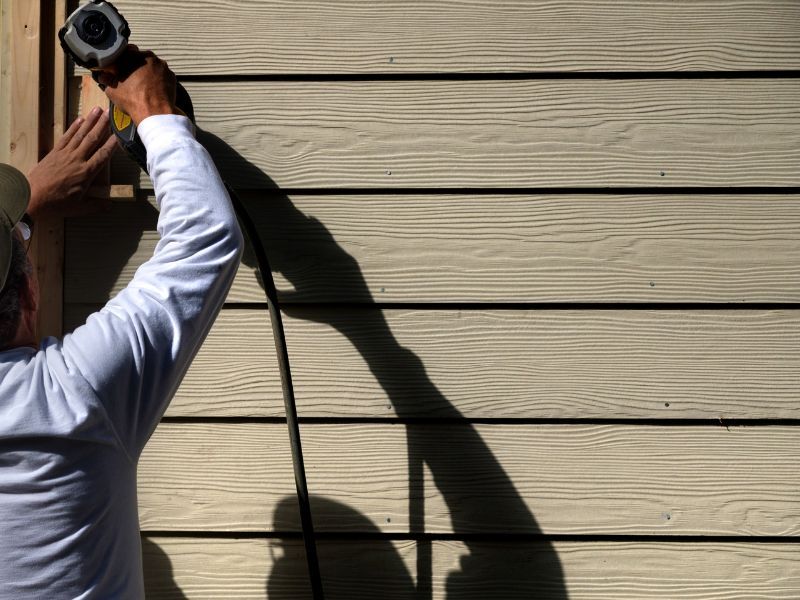
Common Siding Issues and How to Fix Them

Your home’s siding acts as armor against the elements but can deteriorate over time. Issues like cracking, warping, moisture damage, fading, pest infestations, and loose panels are common. Proper maintenance and timely repairs are essential to keep your siding looking great and functioning well. Use appropriate methods for different materials and stains, ensure proper installation, and consider professional help when needed. For expert siding repair and home maintenance in Nebraska, Omaha Handyman Service offers a wide range of services to keep your home in top shape.


Think of the siding of your home as the armor that protects it from the elements. Over time, however, it can start to show signs of deterioration, just like anything else.

Whether you have vinyl, wood, or fiber cement siding, it can face issues like cracks, warping, moisture damage, and even pest infestations. 

In a 2021 study, approximately 14 million of the 124 million occupied housing units in the United States reported seeing roaches in their homes within the past year. These problems can affect both the look and protection of your siding. Luckily, we are here to help. So, let’s dive in and ensure your home remains beautiful and safe.

Cracking and Warping

Cracking and warping are common problems with materials like vinyl and wood. Cracking can occur when the siding material breaks or splits, while warping involves the bending or twisting of the siding panels out of their original shape. 

Causes of Cracking and Warping

When exposed to rapid or severe changes, such as a sudden frost following a warm day, siding materials can become prone to damage and crack. Similarly, intense heat can have a negative impact on materials like vinyl and lead to warping.

Poor installation practices are another significant cause. If the siding is installed too tightly, without allowing space for natural expansion and contraction, it is more likely to crack or warp under stress. Additionally, if nails or fasteners are not properly spaced or driven too tightly, they can create stress points that lead to cracking.

Impact damage from hail, falling branches, or even errant baseballs can also cause the siding to crack. Over time, these impacts can create weak spots that can split. 

Solutions for Cracking and Warping

Homeowners can seal small cracks with a vinyl siding repair kit or caulk designed for their specific siding material. However, for larger cracks or extensive warping, it’s usually best to replace the affected sections entirely. This ensures that the integrity of the siding is maintained and that the home remains well-insulated and protected.

When replacing siding, it’s crucial to follow proper installation techniques. This includes allowing for some movement to accommodate temperature changes and ensuring that fasteners are appropriately spaced and not too tight. For warped wood siding, replacing the affected boards and treating the area with a water-resistant sealant can help prevent future issues.

Moisture Damage

Moisture damage arises when water goes inside the siding material. This can lead to a various complications, including mold growth and rot. Moisture damage can also affect the underlying structure of your home.

Causes of Moisture Damage

High humidity levels and frequent rainfall are common causes, especially in regions prone to wet weather. Improperly sealed joints or gaps in the siding can allow water to enter, leading to moisture buildup behind the panels. Damaged or missing flashing around windows, doors, and other openings can also allow water to enter.

Another common cause is poor drainage around the home. If water is allowed to pool around the foundation or on flat surfaces, it can eventually seep into the siding. Additionally, siding materials that are not adequately water-resistant or have degraded over time can absorb moisture, leading to swelling, warping, and eventual rot.

Solutions for Moisture Damage

First, inspect the siding for damage like discoloration, swelling, or mold. Replace or correctly install damaged or missing flashing to reduce water penetration, and consider installing a moisture barrier for additional protection. Improve drainage by regrading the landscape, maintaining gutters and downspouts, and adding solutions like French drains if needed. 

Fading and Discoloration

When your home has discoloration, it can look aged and poorly maintained. Addressing fading and discoloration can improve your home’s curb appeal and extend the life of the siding material.

Causes of Fading and Discoloration

UV radiation breaks down the pigments in the siding material, leading to a gradual loss of color. This is particularly noticeable in darker siding colors, which tend to absorb more heat and degrade faster than lighter shades.

Pollution and dirt accumulation are other common causes. Over time, these contaminants can embed themselves into the material, making cleaning more difficult.

Low-quality paint or siding materials are also prone to fading and discoloration. Cheaper materials may not have adequate UV protection or may use inferior pigments that degrade quickly. 

Solutions for Fading and Discoloration

To rejuvenate discolored siding, a thorough cleaning with a soft brush or pressure washer and mild detergent often works. For persistent discoloration or stains, try repainting and use high-quality, UV-resistant products designed for exterior use.

Regular cleaning prevents pollutant buildup while applying a UV-protective coating can shield the siding from sun exposure. For continued protection, reapply these coatings periodically. For long-term solutions, opt for durable, fade-resistant materials like fiber cement and high-grade vinyl.

Pest Infestation

Common pests, such as termites, ants, and rodents, can find their way into small openings in the siding and create big problems with your siding. Understanding the causes of pest infestations can help you maintain the integrity and aesthetics of your home.

Causes of Pest Infestation

Gaps, cracks, or holes in siding provide easy access for pests to enter and nest in your walls. Poorly maintained or rotting siding attracts insects and rodents seeking shelter. Homes near wooded areas or heavy vegetation are more prone to pest problems due to their proximity to natural habitats.

Solutions for Pest Infestation

Look for small holes, gnaw marks, droppings, or nests indicating pests. Act quickly if you detect an infestation. Seal gaps, cracks, or holes in the siding with caulk or appropriate materials. For larger damage, replace affected sections to ensure a secure barrier.

Using pest-resistant materials like fiber cement and treated wood is effective against insects. Professional pest control can assess and treat severe infestations and provide prevention advice. To prevent pests, maintain a clean, dry environment, ensure proper drainage, and trim vegetation away from siding.

Loose or Missing Siding

When siding panels become loose or fall off, the underlying materials can become vulnerable to the elements. It’s important to understand the causes of this problem so that you know how to fix them.

Causes of Loose or Missing Siding

Strong winds, heavy rains, and storms can dislodge siding, especially if not securely fastened. Over time, harsh weather can weaken fasteners, causing siding to loosen or fall off.

Improper installation is another cause, as incorrect fastening or spacing can prevent secure attachment. Nails or screws that are too tight or loose fail to hold the siding properly.

Age and wear also contribute. As siding ages, it can become brittle and less resistant to environmental stress. Temperature changes cause expansion and contraction, loosening fasteners and leading to loose or missing panels.

Solutions for Loose or Missing Siding

To fix loose siding, reattach panels with secure, appropriate fasteners, replacing any damaged ones. Quickly replace missing panels, matching the existing material and following manufacturer guidelines.

For future prevention, ensure proper installation, possibly by hiring a professional, using the correct fasteners, and allowing for expansion.

Final Words: Siding Services in Nebraska

Addressing common siding issues and how to fix them as soon as possible can prolong your home’s exterior lifespan and preserve its visual appeal. 

When you need professional services that will help you with this, Omaha Handyman Service is just a call away. We specialize in a wide range of home repair and maintenance services, including siding repair, painting, plumbing, and more. 


If you’re facing any siding issues or need assistance with home maintenance, give us a call today. Let us help you preserve the beauty and integrity of your home.

Transforming Your Home With Custom Bookcase and Built-In Installation

TL;DR: Homeowners facing storage issues are turning to custom bookcases and built-ins to optimize space and enhance aesthetics. These solutions offer tailored storage options that blend seamlessly with your home decor and maximize functionality. Assess your needs, plan the design, and consider professional installation for the best results. Omaha Handyman Service in Nebraska provides quality installation services to transform your home with custom solutions.


A common concern of homeowners everywhere is not having enough storage space for their belongings. The average American home contains over 300,000 individual items, from everyday household goods to personal tchotchke collections, out of which at least 85% of Americans have physical books and other media they collect.

All these items require proper organization and storage to maintain a tidy and functional living environment. Many homeowners are turning to custom bookcases and built-in installations to address this issue, as these solutions add extra space and help define the aesthetics and functionality of your home. Custom bookcases and built-ins fit seamlessly into your space, matching your home’s decor while adding additional storage.

This approach to storage is increasingly popular, as it allows homeowners to maximize space in a way that off-the-shelf storage solutions cannot. Let’s see how transforming your home with a custom bookcase and built-in installation makes your living space work better for your lifestyle.

What Are Custom Bookcases and Built-Ins?

Custom bookcases and built-ins are a unique solution for storage and organization in your home, tailored specifically to your needs and space. Unlike freestanding bookcases you purchase off-the-shelf and move around, built-in units fit into the structure of your home, which allows for a seamless look that can make any room appear more cohesive and well-thought-out.

You can install these units in virtually any room, be it for organizing toiletries in your bathroom, offering a neat solution for books and decor in your living room, or even creating additional storage in small bedrooms where space is at a premium.

By designing and customizing built-ins, you can maximize the use of space. Whether you need adjustable shelves, special compartments, or innovative solutions like fold-out desks or hidden drawers, customizing your built-ins can completely transform how you use your living space.

The materials used in constructing custom bookcases and built-ins vary widely, letting you select what best fits your home’s decor and personal preferences. Common materials include:

  • Wood: which offers a classic and warm appeal; 
  • MDF: which is an affordable and durable option;
  • Metal: for a modern industrial look; 
  • Glass:  which can add a touch of elegance.

Planning Your Custom Bookcase or Built-In Before Installation

Installing a custom bookcase or built-in can significantly help you optimize the space in your home. When designed and installed correctly, these additions blend seamlessly with your interior design and add substantial value to your property. They offer a tailored solution that standard furniture often fails to achieve by utilizing every inch of available space, complementing the rest of your home’s aesthetic and functionality.

Assessing Your Needs

You must determine what items you plan to store or display in your new custom bookcase or built-in. Are you looking to showcase an extensive collection of books, or are you more interested in a mixed-use space where you can display collectibles alongside everyday items?

Perhaps you need a stylish yet functional area to store clothes or cooking utensils. Once you understand what you need to accommodate, you can better assess the required dimensions and the best location for your built-in. Prime storage spaces to consider include:

  • Home offices
  • Living rooms
  • Entertainment rooms
  • Hallways 
  • Laundry rooms
  • Closets

Design Considerations

When planning the design of your custom bookcase or built-in, align the style with your existing decor. The new addition should complement, not clash with, what you already have. Beyond aesthetics, it’s equally important to consider how this new element will contribute to your home’s functionality. It should add to and improve the practical use of your space. 

Features like adjustable shelves offer flexibility for different-sized items; integrated lighting can beautifully highlight your displayed items, and hidden compartments provide clever storage solutions without disrupting the overall design. All these elements should create a visually appealing and thoroughly practical solution.

Design Ideas for Custom Bookcases and Built-Ins

Installing custom bookcases and built-in features can revolutionize any home, regardless of size. In smaller living quarters, these additions can maximize available space while adding a touch of style and functionality.

For larger homes, they can bring a sense of elegance and coherence, helping to organize space and reduce clutter. Thinking creatively about the design and placement of these features allows you to tailor their functionality and aesthetic to fit your specific needs and preferences.

For Small Spaces

When space is at a premium, opt for vertical bookcase designs that stretch upwards to maximize your floor space. This approach gives you ample storage and draws the eye upward, creating a sense of volume in tight areas. 

Consider installing built-ins around existing features of your home, such as windows or doorways. These installations frame your views beautifully while providing extra shelving or cabinets. Incorporating multi-use features, such as fold-down desks, hidden compartments, or even Murphy beds, into your bookcases or built-ins can be extremely beneficial. 

For Large Collections

For those with extensive collections, whether books, art, or memorabilia, custom solutions can help you organize and display your items efficiently. Floor-to-ceiling bookcases make a dramatic impact and offer vast amounts of storage space.

You can design these units with varying shelf heights to accommodate items of different sizes, from oversized art books to small paperbacks. Custom compartments are also a smart choice, allowing you to tailor each bookcase section bookcase to the dimensions of specific items.

Multifunctional Solutions

Combining bookcases with furniture elements like desks or media centers creates a cohesive look while fulfilling multiple functional needs. A built-in wall unit that has a bookshelf with a desk and media console can serve as an office, entertainment, and storage hub – all in one. This saves space and maintains a streamlined design throughout your home. 

The Installation Process

Opting for professional installation services for your custom bookcase ensures the job meets high standards of quality and accuracy. Professional installers handle everything from precise measurements to final adjustments, reducing the risk of errors that can compromise the structure or look of your bookcase or built-in.

The installation can last a few hours to a few days, depending on the project’s complexity. During this time, expect some disruption in your home, but the team will strive to minimize inconvenience. They usually coordinate with your schedule to choose the best times for work, allowing you to maintain your daily routine with minimal interruptions.

Choosing the Right Professional for Installation

Selecting the right professional for this installation involves a few key considerations. First, assess the installer’s experience. An installer who has worked on numerous similar projects will likely deliver higher-quality work. Review their portfolio to gauge the aesthetics and functionality of their previous installations. 

Finally, read through client reviews to gain insight into their reliability and customer service. Positive feedback from past clients often indicates that the professional maintains a high standard of work and respects client properties and schedules.

Find High-Quality Built-In Installation Services in Omaha, Nebraska

Transforming your home with custom bookcases and built-in installation maximizes your space and adds a personal touch that reflects your style. These installations serve a dual purpose by offering functional storage and a unique aesthetic element to your home’s decor. 

With professional assembly and installation, you ensure these fixtures are set up securely, maintaining their durability and functionality over time. If you want to install custom bookcases or built-ins, think about hiring experts from Omaha Handyman Service in Omaha, Nebraska. 

With over 70 years of combined experience, our skilled craftsmen guarantee top-quality workmanship. Our assembly and installation services mean you won’t have to worry about matching the pieces together or if you have enough screws. Let us turn your house into a beautifully organized and customized home; request an estimate today!

How to Hire Professional Interior Painting Services You Can Trust

TL;DR: Planning to repaint your space? Choosing the right painting service is key. Start by defining your project scope and color preferences. Seek referrals, research online, and check for professional credentials. Interview potential painters, review their portfolios, and ensure they have insurance and warranties. Ask about their experience, preparation process, timeline, and cost breakdown. Consider Omaha Handyman Service for reliable, professional interior painting.


Are you thinking about a fresh, new look for your space through the simple yet transformative power of paint? It’s remarkable how a mere change in color can utterly revitalize a room. But here’s the thing: the outcome of this exciting transformation heavily depends on the pros you choose to bring your vision to life. 

Did you know that 29,300 job openings for painters, construction, and maintenance are expected annually in the USA? Sifting through the endless options of interior painting services can feel a bit like finding a needle in a haystack. You want someone who’s not just going to slap some paint on the walls but will understand and care about turning your vision into reality. 

We’re here to walk you through the steps of finding a perfect painting partner, ensuring your project is in the best hands possible. Let’s dive in!

Understanding Your Painting Needs

You’re not just looking to change the color of your walls; you’re about to redefine your space. But before you dive headfirst into browsing paint swatches, there’s a bit of prep work to do. Think about the scope of your project. Are we talking about a cozy little nook makeover, or is this a full-scale home color revolution?

Now, for the exciting part of selecting colors and finishes. This step allows your personality to truly sparkle. You may want a calming blue for the bedroom to become your serene escape or a vibrant yellow for the kitchen to kickstart your mornings. The options are limitless, with each hue narrating its unique tale.

But here’s a pro tip: don’t skimp on the quality of paint and materials. Sure, that bargain bin paint might look tempting, but you want something that will stand the test of time and the occasional spaghetti sauce splatter. 

Premium paint not only enhances the appearance but also offers superior coverage and durability, ensuring you won’t need to repaint in the near future. Therefore, it’s worth taking a moment to consider your preferences carefully.

Researching Potential Painters

So, you’ve got your vision board, or at least a mental note, ready, and it’s time to find the professionals. Where do you even start? Well, believe it or not, your next painting service might be closer than you think. 


Begin with the people you know – friends, family, even that neighbor whose living room you can’t help but admire. Personal referrals are like gold in the quest for trustworthy painters. There’s nothing quite like getting a recommendation from someone who’s already been through the trenches and comes out smiling on the other side.

Going Digital

Once you’ve chatted with your circle, it’s time to hit the digital pavement. Websites dedicated to home services can offer plenty of painter profiles, complete with ratings, reviews, and photos of past projects. 

Professional Credentials: The Seal of Approval

While browsing, keep an eye out for professional badges of honor. Painters affiliated with trade organizations or holding certifications aren’t just showing off; they’re demonstrating a commitment to their craft and standards. It’s like having a stamp of approval that they take their work seriously, and, more importantly, they’ll take your project seriously, too.

Vetting Your Shortlist

Now it’s interview time. Reach out and set up meetings. Whether face-to-face or online, this is your opportunity to pose the tough questions and determine if they meet your criteria.

Digging into Their Portfolio

Now, let’s talk about their past work because actions speak louder than words. When you ask for a portfolio or samples of their latest work, a reputable painter will be proud to show off their work. It’s an excellent way to see whether their aesthetic complements your vision. Are their lines as sharp as they claim? How’s their play with colors? It’s all in the details.

Insurance and Warranties: The Safety Net

Here’s something you might not think about but absolutely should: insurance and warranties. These safety nets ensure you’re covered if something goes wrong. Check if they have liability insurance so you’re not on the hook if an accident happens, and ask about the warranties they offer on their work. 

They should be fully certified and well-trained, following all legal requirements. Professionals will do their job correctly and treat your home with care. This is about protecting your home and about peace of mind. Knowing they stand behind their work with solid guarantees tells you they’re serious about quality and customer satisfaction.

Questions to Ask Potential Painters

You’re on the verge of transforming your space, and it’s time to get up close and personal with your potential painters. Let’s make sure you find someone who’s not just a fit for your project but a match for your expectations and vibe. Here are some key questions to weave into your conversation.

Experience and Expertise: The Resume

First up, let’s talk about their track record. You wouldn’t hire someone without peeking at their resume. So, ask them about their style of painting. 

  • How long have they been painting interiors? 
  • Do they have a particular style or specialty? 

These questions will make you feel you are in safe hands and will give you ideas for painting styles for your home. They may have some suggestions to offer.

Preparation and Process: Behind the Scenes

Now, onto the preparation and process. This is where you get a glimpse of what is necessary to do when you start a painting job. 

  • How do they prepare a room for painting? 
  • Are we talking about a full-blown protective covering, or is it more of an informal situation? 
  • And what about after the job’s done? 

The cleanup process is just as important because no one wants to find paint splatters on their grandmother’s antique vase.

The Timeline and the Money Talk

Timing is everything. You’ve probably got visions of unveiling your newly painted space with admiration and satisfaction. 

  • But what is their estimated timeline?
  • How quickly can they start, and how long do they expect the job to take? 
  • What does their detailed quote include? 
  • Are we talking just about the labor, or are materials covered too? 
  • And what about surprises along the way – how are those handled?


These elements will help you manage your expectations and plan around the transformation of your space. And it’s about ensuring no hidden surprises will have you digging deeper into your pockets than expected.

Professional Interior Painting Services You Can Trust: Bottom Line

By taking the time to vet potential services thoroughly, you ensure a partnership that not only meets but exceeds your expectations, enhancing the beauty and value of your home for years to come.

That’s where Omaha Handyman Service steps in. With a wide range of home improvement, upgrading, and repairing services, including professional interior painting, we’re equipped to turn your vision into reality. Our estimates are free, and we offer monthly home maintenance plans. 

Our team of skilled professionals is committed to providing top-notch service, ensuring your painting project is completed with the utmost care and precision. Omaha Handyman Service has the expertise and experience to bring your dreams to life, no matter the scale of the project.

Finding the right partner is crucial, especially for professional interior painting services you can trust and who deliver on their promise of quality and reliability.

Ready to transform your space with a fresh coat of paint? Contact Omaha Handyman Service to learn how we can help with your next project. Make your dream about a beautifully painted home a reality with Omaha Handyman Service. Your journey to a refreshed, vibrant home starts with a single click.

Siding Solutions: Reliable Repair Services for a Refreshed Home

TL;DR: Quality siding enhances your home’s look, energy efficiency, and protection. Materials like vinyl, fiber cement, wood, and engineered wood offer durability. Reliable repair services ensure expertise, quality work, and prolonged siding life. Consider credentials, work quality, warranty, communication, and cost when choosing a service. Invest for improved comfort, durability, and savings.


Have you ever thought about revitalizing and enhancing the overall look of your home? That’s a goal that many other homeowners strive to achieve. One significant way to accomplish this is by discovering siding solutions and finding reliable repair services for a refreshed home

Around 53% of homeowners in the United States have siding installations performed on their homes. Siding not only adds to the aesthetic appeal of your private property but also provides numerous functional benefits that can significantly improve your living experience. 

In this article, we’ll explore the various advantages of quality siding installations, dive into the different types of siding materials, and provide advice on discovering the transformative effects of professional siding installations on homes.

The Role of Quality Siding Installations

The siding market is currently worth over $120 billion due to the increasing demand for house renovations and remodeling projects. Investing in quality siding installations offers several benefits that can greatly enhance the value and livability of a home. Let’s go over them in detail. 

Increased Energy Efficiency

By providing better insulation, quality siding installations contribute to increased energy efficiency. This can lead to reduced utility bills, ultimately saving you money and stress over managing your expenses.

Enhanced Curb Appeal

Siding is one of the first elements people see when they observe your home from the outside. Investing in quality siding can dramatically enhance the overall curb appeal, making the appearance of your home more aesthetically pleasing and potentially increasing its market value.

Protection Against the Elements

Quality siding serves as a shield against the outside elements, protecting your home from weather-related damage. This can help prevent moisture intrusion and protect the structural integrity of your home.

Exploring Different Types of Siding Materials

You’ll find that many types of sliding materials are available, each with its unique features, durability, maintenance requirements, and aesthetic appeal. Some of the most sought-after options include:

  • Vinyl Siding. Known for its longevity and resistance to rot, warp, and pests. 
  • Fiber Cement Siding. This one is highly durable. It’s also resistant to fire, moisture, and pests. It requires minimal upkeep and is known for its long-lasting performance. 
  • Wood Siding. Provides a natural appearance. To protect it from the elements, it requires painting, staining, and sealing.
  • Engineered Wood Siding. Offers enhanced durability and dimensional stability. It provides the warmth and beauty of traditional wood while offering improved resistance to decay and insects. 

Importance of Hiring a Reliable Siding Repair Service for a Refreshed Home

Siding, being a crucial component of a home’s exterior, plays a significant role in protecting the structure from the elements and enhancing its visual appeal. When siding becomes damaged or worn, hiring reliable siding repair services for a refreshed home is essential. 

Below, we discuss the benefits they offer to homeowners just like yourself:

  1. Professional Expertise. Hiring a reliable siding repair service ensures that the repairs are carried out by professionals with the necessary expertise and experience. 
  2. Quality Workmanship. Reliable siding repair services are committed to delivering quality workmanship. They have access to the right tools and practices to complete the projects to a high standard, ultimately contributing to the long-term durability of the siding.
  3. Protection Against Further Damage. Timely and effective siding repairs help prevent existing damage from worsening. Properly addressing issues such as cracks, warping, or moisture intrusion can prevent more extensive and costly damage to your home’s structure.
  4. Enhanced Curb Appeal. Well-kept siding contributes to a home’s overall curb appeal. A reliable siding repair service can restore your home’s exterior to its former aesthetic appeal, ensuring that it remains an attractive property in the neighborhood.
  5. Improved Insulation. Damaged siding can compromise the insulation of your home, leading to energy inefficiency and increased utility costs. Reliable siding repair services can address issues that impact insulation, helping you maintain a comfortable indoor environment and reduce energy expenses.
  6. Preventing Costly Repairs. By addressing minor siding issues promptly, you can avoid more extensive and expensive repairs in the future. Hiring a reliable siding repair service for routine maintenance and minor repairs can help save money by preventing the need for major restoration work.
  7. Extending Siding Lifespan. Well-maintained siding has a longer lifespan, reducing the frequency of replacements and associated costs. A reliable siding repair service can help you as a homeowner maximize the longevity of your siding through proper maintenance and timely repairs.

Tips for Choosing a Reliable Siding Repair Service

When it comes to selecting a siding repair service for your home, choosing a reliable and reputable provider is essential to ensure that the job is done right. Let’s go over some valuable tips you can consider when looking for a reliable siding repair service:

Research and Reviews

Use online resources to research local siding repair services. Pay attention to customer reviews and testimonials. There are numerous online platforms you can browse through to gain valuable insights into the quality of service provided by the siding repair companies.

Credentials and Experience

Ensure that the siding repair provider has the mandatory licenses and insurance coverage. This protects both you and the service provider in case of unfortunate incidents or property damage during the repair procedure.

Dive deep into the experience and expertise of the siding repair technicians. A reputable service should offer the hands-on practice of skilled professionals with a proven track record in siding repair and maintenance.

Quality of Work

Go through their portfolio of previous siding repair projects. This can help you grasp the company’s capabilities and the quality of its workmanship. Ask for the materials and techniques the company uses for siding repairs.

Warranty and Guarantees

Before choosing a siding service, ask about the warranty the service offers on their repair work. A reputable provider should stand behind their work and offer assurances regarding the quality and longevity of their repairs.

Transparent Communication and Customer Service

Evaluate the company’s communication practices and find out if they’re responsive to inquiries, transparent about the repair process, and willing to address any concerns or questions you may have. Assess the level of customer service provided and ensure they maintain a friendly, professional, and courteous approach and prioritize the needs of their customers.

Cost and Estimates

Obtain detailed written estimates from multiple siding repair services. Consider the value offered concerning the cost. While cost is important, prioritize a service that offers quality work and reliability over the lowest price.

Conclusion

Reliable repair services for a refreshed home play a significant role in improving the overall look and functionalism. From improved insulation and energy efficiency to enhanced curb appeal and protection against the elements, the benefits of investing in quality siding solutions are undeniable. 

If you’re considering or planning to install siding, investing in a quality service provider like Omaha Handyman Services can result in a home that not only looks beautiful but also provides improved comfort and durability. Ensuring energy efficiency, weather resistance, and long-term cost savings are just some of the aspects we’ll help you with.

Sounds compelling enough? Reach out to us today, and let us beautify your home’s exterior!

How Regular Deck Staining Keeps Your Deck Looking Its Best

TL;DR: Deck staining is vital for protecting and enhancing wooden decks, with timing crucial for optimal results. Staining improves appearance, deters rot and pests, resists moisture, and extends deck lifespan. The process involves cleaning, staining, and drying, with options including stain or paint. While DIY is possible, professional staining offers expertise and efficiency, ensuring a high-quality finish. For professional deck staining in Omaha, Nebraska, consider Omaha Handyman Services for expert results and peace of mind.

What is deck staining? It is a process that helps protect and enhance a wooden deck’s appearance. Deck stains come in various colors and types, so picking out the best requires basic knowledge and understanding of the deck staining process. 

A key thing to figure out is how regular deck staining keeps your deck looking its best. That is why we will dive into the world of deck staining now, exploring how the process works and how it affects your wooden floor in the long run, offering an extended lifespan by preventing damage from moisture, UV rays, and pests. 

When Should You Stain Your Deck?

Picking the right time to stain your deck matters if you want to achieve the best results. Various factors directly affect the staining process, including climate, deck material, and foot traffic, so timing is of the essence. When thinking about staining your deck, consider the following: 

  • Choosing the right season: The optimal season for deck staining is late spring or early fall, as generally mild weather makes deck wood less likely to be affected by extreme temperatures or moisture. These seasons ensure optimal conditions for the stain to penetrate and adhere to the wood, thus resulting in a more durable finish.
  • Weather considerations: From a more specific weather-based aspect, the temperature directly affects the staining process. As a rule, avoid staining your deck on hot and sunny days, as the heat can dry the stain too quickly. Similarly, refrain from staining when expecting rainfall within 24-48 hours, as moisture interferes with the staining process, affecting the quality of the finish.
  • Deck size: Consider the size of your deck and the necessary preparation to determine the best time to stain. Larger decks require more time to complete the staining process. Furthermore, if your deck requires pressure washing before staining, you must factor in the extra time for this step.

How Regular Deck Staining Keeps Your Deck Looking Its Best

Deck staining is a crucial process in extending the lifespan of a wooden deck and protecting it against the elements. It also contributes significantly to its appearance, bringing out the natural beauty of the wood. Here’s why you should try staining your wooden deck: 

  • Improved Appearance: With staining, your deck will look much better and more well-preserved. That aside, a vast range of stain colors and tints are available, so you should carefully choose the perfect stain to compliment your home’s exterior, highlighting the natural beauty of the wood.
  • Deterring Rot and Infestation: One of the key advantages of regular deck staining lies in its protective capabilities. Wood stains create a protective barrier that seals the deck against moisture, thus preventing the wood from rotting. Stains also deter pests from infesting the wood, preventing costly damage from termites and other wood-boring insects.
  • Moisture Resistance: Moisture absorption is crucial for maintaining the structural integrity of the wood, a property associated with properly stained decks. During the winter, the moisture seeps into the wood and can freeze, resulting in damage such as warping and cracking. Regular deck staining creates a barrier that helps seal the wood, preventing moisture from penetrating in the first place.
  • Enhanced Lifespan: When put together, all of the above properties of deck staining significantly extend your wooden deck’s lifespan. Protection against the elements, pests, and moisture means that the deck will look incredible and retain its look and quality for longer. 

Understanding the Deck Staining Process

If you’ve never tried staining your deck before, here’s a step-by-step guide that can help you learn how the entire process goes: 

  • Cleaning and Preparation: You must clean the deck surface before anything else. Begin by thoroughly sweeping the deck and removing dirt, debris, and existing stains or paint. Grime, mold, and mildew removal come next, which involves using a deck cleaner through a roller or pump sprayer and then scrubbing the deck surface with a stiff bristle brush. When done, rinse the deck thoroughly to remove any remaining cleaning solution.
  • Stain Application: You can apply the stain once the deck is clean and dry. A brush, roller, or sprayer helps you apply the stain evenly to ensure an even consistency. Divide the application into small sections so that you do not skip over any area and can avoid overlapping or pooling of the stain. Pay special attention to high-traffic areas and horizontal surfaces, which require extra protection. Before applying the stain, make sure to read the stain manufacturer’s instructions carefully. 
  • Drying and Curing Time: After the staining, your deck will need to dry. The exact drying time comes down to various factors, ranging from the type of stain to weather conditions and the area’s humidity levels. Most wood stains take up to 24-48 hours to dry. Do not walk along the deck or place anything that may affect the staining until the stain is fully cured.

Deck Stain vs. Deck Paint

When deciding between deck stain and paint, start by considering your personal preferences, the overall condition of your deck, and the level of maintenance you’re willing to undertake. The decision comes down to appearance, durability, application, maintenance, and cost.

Stains are the better option for decks in general, mainly because they penetrate the wood deeper and provide a more natural look, allowing the texture and grain to come through. Staining also requires less preparation than paint since no priming is involved, while the entire process costs less than having your deck painted.

On the other hand, paint provides a wider range of color options and can provide a more consistent appearance. Decks with extensive damage are easier to cover up using paint. Still, paint requires much more attention and upkeep, as it can chip and peel easily. 

DIY Staining vs. Professional Staining

Staining may seem like a simple process, and honestly, it is not too difficult to perform. However, it does require some experience. While you may do it yourself if you are set on that idea, turning to professionals is usually much better. 

On the plus side, DIY staining means saving money and getting complete control over the process. However, it requires proper preparation, knowledge of staining techniques, and access to the necessary tools and materials. Also, it is very time-consuming, especially for larger decks, and any mistake can lead to unsatisfactory results. 

Hiring professionals for deck staining guarantees a high-quality finish and saves you precious time and significant effort. Professional stain applicators have the expertise, experience, and equipment to achieve even coverage and avoid common pitfalls. Moreover, entrusting your deck staining to professionals also comes with an extended warranty as opposed to DIY staining. 

Professional Deck Staining in Omaha, Nebraska

Staining is the best solution if you want your wooden deck to be beautiful, durable, and last a long time. Understanding how regular deck staining keeps your deck looking its best means you can ensure you take the most adequate steps to perform it. While you may be tempted to apply the staining process by yourself, remember that many things factor into how the end product will look. 

Turning to a professional service like our Omaha Handyman Services for all your staining needs is the easiest and most reliable way to ensure the process goes smoothly. All it takes is to reach out to us today for a precise estimate, and we will easily determine the right time for staining and type stain for your deck.

FAQ’s

Why is deck staining important?

Deck staining is essential for protecting your wooden deck from moisture, UV rays, pests, and general wear and tear. It enhances the appearance of the deck while extending its lifespan. At Omaha Handyman Services, we understand the importance of deck staining in preserving your investment and keeping your deck looking its best for years to come.

When is the best time to stain my deck?

The optimal time for deck staining is typically in late spring or early fall when weather conditions are mild, ensuring proper adhesion and penetration of the stain. At Omaha Handyman Services, we consider factors like climate, deck material, and foot traffic to determine the ideal time for staining your deck, ensuring the best possible results.

Should I opt for DIY deck staining or hire professionals?

While DIY staining is possible, it requires proper preparation, knowledge, and time commitment. Hiring professionals like Omaha Handyman Services ensures a high-quality finish, saves time and effort, and comes with the added benefit of an extended warranty. Our experienced team utilizes the right techniques and equipment to achieve even coverage and lasting results.

How do I choose between deck stain and paint?

Choosing between deck stain and paint depends on factors like personal preference, desired appearance, durability, and maintenance level. Deck stain, preferred for its natural look and deeper penetration, is recommended by Omaha Handyman Services for its ability to preserve the wood’s texture and grain while requiring less preparation and maintenance compared to paint. However, for extensive damage coverage and a wider range of color options, paint may be preferred despite its higher maintenance requirements.

What Type of Door Lock is The Most Secure?

TL;DR: Choosing the most secure door lock involves considering factors such as material quality, locking mechanism, and certifications. Deadbolts, keyless entry systems, and smart locks are among the top options for optimal security. Consulting with professionals like Omaha Handyman Services can ensure proper installation and guidance in selecting the right lock for your home.

Securing your home starts with selecting the right door lock. With various options available on the market, it can be challenging to determine which type offers the best security for your needs. In this guide, we’ll delve into the world of door lock security, exploring different types of locks and what sets them apart. Whether you’re upgrading your existing locks or installing new ones, understanding the key factors that contribute to security is essential. And for expert installation and advice, consider reaching out to Omaha Handyman Services, your trusted partner in home maintenance and security.

Understanding Door Lock Security: What Matters Most?

When it comes to door lock security, several factors come into play. Understanding these factors can help you make an informed decision when choosing a lock for your home:

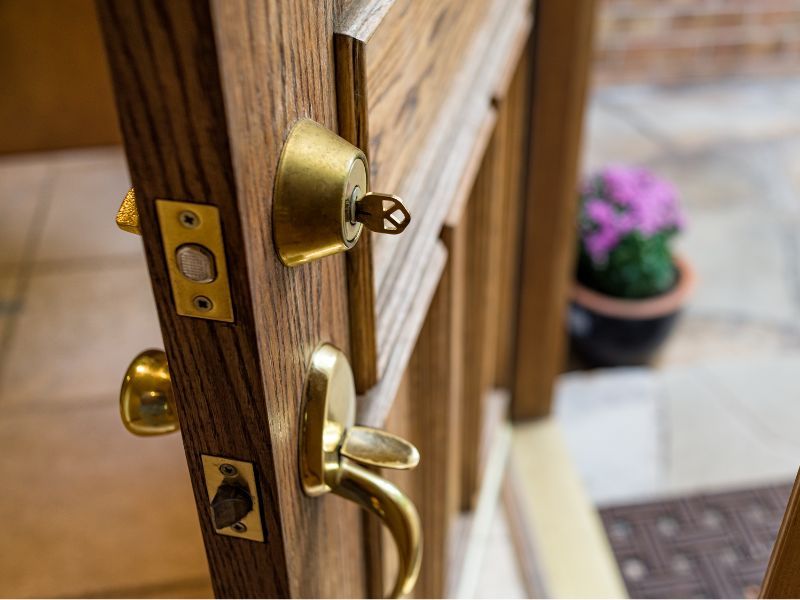
  • Material Quality: High-quality materials like solid steel or brass contribute to the durability and strength of a lock, making it more resistant to tampering or forced entry.
  • Locking Mechanism: Different types of locking mechanisms, such as deadbolts, keyless entry systems, and smart locks, offer varying levels of security. Assessing the pros and cons of each mechanism can help you determine which aligns best with your security needs.
  • Key Control: The ability to control who has access to your keys is crucial for maintaining security. Some locks offer features like key duplication restrictions or the ability to rekey the lock without replacing the entire mechanism, enhancing security and convenience.
  • Certifications and Ratings: Look for locks that meet industry standards for security, such as ANSI/BHMA grades or certifications from organizations like UL (Underwriters Laboratories) or ASTM International. These certifications indicate that the lock has undergone rigorous testing and meets specific security criteria.

Comparing Door Lock Types: Which Offers the Best Security?

Let’s take a closer look at some common types of door locks and evaluate their security features:

  • Deadbolts: Deadbolts are one of the most secure types of locks, featuring a solid metal bolt that extends into the door frame when engaged. They provide excellent resistance against forced entry and are available in single-cylinder, double-cylinder, and even smart variations for added security and convenience.
  • Knob Locks: While knob locks are commonly found on interior doors, they are not as secure as deadbolts and can be easily bypassed by intruders. It’s advisable to complement knob locks with additional security measures, such as deadbolts or keyless entry systems, for exterior doors.
  • Keyless Entry Systems: Keyless entry systems, including keypad locks and electronic deadbolts, offer advanced security features such as customizable access codes, tamper alarms, and remote access capabilities. These systems eliminate the need for traditional keys, reducing the risk of unauthorized key duplication and enhancing overall security.

The Quest for Security: Exploring Different Door Lock Mechanisms

In the quest for security, exploring different door lock mechanisms is essential. Here are a few additional options to consider:

  • Smart Locks: Smart locks utilize wireless technology to provide remote access control and real-time monitoring of your door’s status. With features like smartphone integration, biometric authentication, and activity logs, smart locks offer unparalleled convenience and security for modern homeowners.
  • Mortise Locks: Mortise locks are often found in commercial buildings and high-security applications due to their robust construction and resistance to tampering. These locks feature a heavy-duty mortise mechanism installed within the door, providing superior protection against forced entry attempts.

In Summary

Choosing the most secure door lock for your home involves evaluating various factors such as material quality, locking mechanism, key control, and certifications. Deadbolts, keyless entry systems, and smart locks are among the top contenders for optimal security, offering features like solid construction, advanced technology, and industry certifications. By understanding the different types of locks available and their respective security features, you can make an informed decision to safeguard your home and loved ones. And for professional installation and guidance, don’t hesitate to contact Omaha Handyman Services, your reliable partner in home security solutions.

FAQ

How do I know if a door lock is secure enough for my home?

Assessing the security level of a door lock involves considering factors such as its construction materials, locking mechanism, and industry certifications. Look for locks made from durable materials like solid steel or brass, with features such as deadbolts or keyless entry systems for added security. Additionally, certifications from organizations like ANSI/BHMA or UL can indicate that a lock meets industry standards for security.

Are smart locks as secure as traditional keyed locks?

Smart locks offer advanced security features and convenience, but their security level ultimately depends on factors such as encryption strength and vulnerability to cyber attacks. When choosing a smart lock, opt for reputable brands with robust encryption protocols and regular firmware updates to minimize the risk of unauthorized access. Additionally, consider complementing smart locks with traditional deadbolts for added security.

Can I install a new door lock myself, or should I hire a professional?

While some homeowners may feel comfortable installing a new door lock themselves, hiring a professional locksmith or handyman is advisable, especially for complex installations or if you’re unsure about your DIY skills. Professionals have the expertise and tools to ensure proper installation, maximizing the lock’s effectiveness and minimizing the risk of errors or security vulnerabilities.

How often should I replace my door locks for optimal security?

The frequency of replacing door locks depends on factors such as wear and tear, changes in security needs, and advancements in lock technology. As a general rule, consider replacing your door locks if they show signs of damage, if you’ve experienced a security breach, or if you want to upgrade to more secure options. Additionally, regular maintenance and inspections by a locksmith can help identify any potential issues and ensure your locks remain secure over time.

Transforming Your Space: The Power of Professional Whole Home Interior Painting

TLDR: Transforming your living space begins with professional whole-home interior painting. This article explores the impact of color on interior spaces, the benefits of choosing professional painters, and the pros and cons of DIY painting. It also covers the importance of maintaining newly painted interiors for a long-lasting, beautiful home. Whether you seek to create a cozy atmosphere or a vibrant living space, this guide helps you make informed decisions for your interior design projects.

Transforming your living space into a place that truly reflects your style and personality begins with a canvas of color. The power of professional whole-home interior painting can’t be understated when it comes to rejuvenating your environment. It’s not just about adding a fresh coat of paint; it’s about creating an ambiance that resonates with your lifestyle and aspirations. In this blog, we’ll delve into the transformative magic of whole-home interior painting and how skilled professionals can turn your vision into a vibrant reality. From selecting the perfect color palette to the meticulous execution of every brushstroke, we’ll explore how this process can breathe new life into your home, making it a sanctuary that’s both visually stunning and uniquely yours. Whether you’re seeking a total makeover or subtle enhancements, this article will guide you through the artistry of home transformation.

The Impact of Color on Interior Spaces

The use of color in interior spaces is an important design element that can be used to influence the atmosphere and create a desired effect. Consequently, the impact of color on any given interior space should not be taken lightly. For instance, certain colors can be used to keep a space feeling light and airy, while the use of darker colors can create an intimate, cozy atmosphere. Similarly, cool hues can give off a relaxing, calming feel, while warm colors can create a vibrant, energetic atmosphere.

On the other hand, the wrong colors can have an adverse effect. Using too much white, for example, can create an overbearing feeling of sterility, making a space cold and unwelcoming. When different colors are not used in harmony, a space can appear messy and cluttered instead of dynamic and organized.

Therefore, it is important that when selecting colors for an interior space, the right balance is achieved. Furthermore, it may be beneficial to incorporate a variety of shades and hues in order to prevent the space from feeling stagnant and mundane. As a result, this will make it easier for the space to adjust and adapt to different moods and atmospheres.

In addition to this, the impact of colors used in interior spaces can also be affected by the lighting used within the space. For example, natural light can have a very different effect on the colors used in a space, making them appear lighter or darker than intended.

In conclusion, it is clear that color can have a huge impact on not only the overall aesthetic of a space, but also its atmosphere. Therefore, careful consideration should be given to the color options when deciding on decor for any interior space.

Why Choose Professional Interior Painting Services

Hiring professional interior painting services is one of the best investments you can make for your home. The primary benefit of doing so is that you can ensure your project is done correctly from start to finish. Professionals have experience and specialized tools that help them work faster and get better results. Moreover, with a professional interior painter, you don’t have to worry about doing the job yourself nor do you have to worry about giving up your weekends to get it done.

Professional interior painting services provide quality products that offer superior coverage and durability when compared to others. They can also help you determine which type of paint and materials are the best for each job and have the resources to help you with the overall color choices that will look great in your home. On the other hand, accomplished professionals understand painting techniques and can make sure the job looks and feels perfect from top to bottom.

In addition, professional interior painting services can help protect your home from further damages. Professionals understand how to prepare surfaces for painting and can identify problems that can potentially cause future damage. They know how to recognize warning signs of water and structural problems and can help expedite the repair process to ensure these issues don’t happen again.

For instance, interior painters can help increase the value of your home by creating artwork and features that will increase its value. In contrast, an experienced painter can bring out the best in any space whether the goal is to create a modern vibe, a warm and cozy atmosphere or to create a luxurious living space.

Similarly, professional interior painting services can provide you with the design advice you need. Homeowners can be overwhelmed with choices when starting a painting project. An experienced painter can guide you through the process offering the best ideas and help you create the perfect atmosphere in every room of your home.

As a result, when you are looking for professional painting services, you should be sure to find the best professionals that are experienced, skilled, and reliable. They should be able to provide you with quality results and a great customer experience. Consequently, you can enjoy the convenience of a beautiful new interior while having peace of mind knowing that the job was done correctly.

Professional vs. DIY: Pros and Cons

When it comes to any kind of task, there are always two solutions that come to mind: doing it on your own or hiring a professional to do it for you. There are advantages and disadvantages to either approach, and it can be difficult to determine which best benefits you and your project. To help you make the most informed decision, let’s take a closer look at the pros and cons of both professional and DIY.

One of the biggest advantages to doing a project yourself is that it is significantly cheaper than hiring a professional. Of course, you may still have to buy necessary supplies for the job, but overall you’ll save a lot of money. You can take your time to see the project through to the end and enjoying the satisfaction of having done it yourself.

On the other hand, a professional may cost more, but they have the necessary skills and expertise to get the job done quickly and efficiently. Additionally, you can have the assurance that the quality of their work will be a lot higher than if you do it yourself. If something goes wrong, they will be more readily available to correct it, eliminating much of the frustration and guesswork. If you’re doing a project yourself and something goes wrong, you may struggle to find a solution on your own. Similarly, it could take a lot longer for you to complete the project than it would for a professional. As a result, it may ultimately cost you more in the long run to do it yourself if the job requires a higher degree of skill and accuracy.

Therefore, when deciding to go the professional versus DIY route, make sure to consider the charges, the complexity of the job, the potential risks, and the amount of time and effort that must be invested. Ultimately, the decision should be based on what best fits your financial capabilities and needs.

Maintaining and Caring for Your Newly Painted Interiors

Maintaining and caring for newly painted interiors is an important step to keeping a home looking beautiful through the years. It is important to ensure that the paint is properly applied, and that the surface is smooth and even. Sufficient preparation and protection of the surfaces to be painted is vital in ensuring the longevity of the paint job. Before painting is started, ensuring that the walls are cleared of cobwebs, dust, and debris is vital. Use a vacuum to get these and any other particles off the walls. In addition, any old wallpaper that is left over will need to be removed to ensure a solid foundation for the new paint job.

Any damp, damaged, or peeling areas of the surface to be painted should be treated before painting begins. Mould and mildew can spread if not treated and should be cleaned up, and any cracks in the plaster should be repaired with plaster filler before the paint is applied. It is also important to invest in quality paint and, if using a sprayer, to use quality paint filters to prevent clogged nozzles and uneven distribution of the paint. Furthermore, paint should be applied with at least two coats, which should be left to dry completely in between applications.

When drying, windows should be partially opened to allow the paint to dry evenly and prevent bubbling and peeling. Similarly, if natural paint is used, it is important to not let the surfaces become too hot or too cold as this can cause bubbling and peeling as well. For instance, during winter months, space heaters can be used to keep the space warm and protect the paint.

As a result of all of these careful steps, the newly painted interiors will remain looking spotless for years to come. It is important to conduct regular inspections of the paint job and keep an eye out for any areas with moisture or cracks, that may need to be addressed as soon as possible. Regular maintenance such as dusting and vacuuming can ensure that the paint job is kept clean and prevent any build-up of dirt or debris which could damage the paint.

Final Thoughts

The use of color in interior spaces can affect the mood, atmosphere, and general feel of any space in a variety of ways. Knowing what colors to use is key to any successful design. Professional interior painting services can provide assistance with the color selection process as well as handle the painting process itself, which requires specialized tools and techniques to be done correctly. However, for those with limited resources and time constraints, DIY painting may be an option. In either case, proper preparation and maintenance of the painted interior can extend the life of the space and prevent the need for frequent repainting.

Frequently Asked Questions

What are the benefits of hiring a professional for whole home interior painting?

Hiring a professional for interior painting offers many benefits, including:

1. Professional expertise: Professional interior painters have the expertise and experience to help select the best paints and finishes for the job, from proper application techniques and tools, to recognizing potential issues and providing creative solutions.

2. Cost savings: Professionals can typically complete interior painting projects faster and more efficiently, resulting in time and cost savings to the homeowner.

3. Quality results: Professional painters use the highest quality products and services to ensure the paint job lasts for years to come. Additionally, with access to the latest techniques and tools, they can guarantee a perfect finish and provide quality craftsmanship.

4. Cleanliness: Professional painters know the importance of keeping your home clean while they perform their work, and follow a strict protocol to prevent dirt and dust from getting into your home.

5. Safety: Workplace safety is a priority for professional painters, and they will take all necessary precautions to protect your health, including using low-emitting, low-VOC paints to reduce indoor air pollution.

What is the average cost of a whole home interior painting project?

The average cost of a whole home interior painting project depends on a variety of factors, including the size of the home, number of rooms, type of paint, and the complexity of the project. Generally speaking, the average cost could range anywhere from $2,500 to $7,500.

How long does it typically take to paint the entire interior of a house?

The amount of time it will take to paint the entire interior of a house will depend on the size of the house and the number of rooms. On average, it can take anywhere from three to seven days to paint the interior of the house. This is assuming that there are two coats of paint in each room and that the painting company is working with a regular-sized crew of at least three people.

What is the difference between various paint finishes (e.g.matte, satin, gloss)?

Paint finishes refer to how the paint looks and feels once it has been applied. The different types of finishes are generally categorized according to the amount of sheen or shine they provide. The most common categories are: Flat/Matte, Eggshell, Satin, Semi-Gloss, and Gloss.

Flat/Matte paint finishes often have either no or very little sheen, making them ideal for low traffic areas and ceilings.

Eggshell finishes give a low sheen, making them a popular choice for walls in residential areas.

Satin finishes give an even higher sheen than eggshells, making them great for wall that want to stand out and look attractive.

Semi-Gloss paint finishes provide a high sheen which reflects more light than other paints, making them perfect for cabinets and trim.

Gloss paint finishes have the highest level of sheen, and can be hard to clean and maintain but make a bold statement.


How High Up To Mount Your TV On The Wall

When it comes to mounting your TV, many people are often lost on where they should mount it exactly. A professional TV mounting service will have many suggestions and opinions when it comes to mounting a TV as they know the perfect place and height of where it should be.

When people are ready to mount a TV, they often don’t consider height until it is time to do the job! Then they are left wondering how high up the TV should be so that they can use and see it, both properly and safely.

We’ve put together a quick guide below to be a reference the next time you are hanging a television. Keep in mind, this is just a reference. When hanging televisions in rooms such as a bedroom, you may want to raise the TV for best viewing while laying down.

Below we’ll cover the most important things to know to calculate the correct height to hang your TV.

Mounting a Flat Screen

As flat screens have become more and more popular and have become the standard for television type, people are considering mounting them more than ever. Many people may feel that it saves space and looks better, providing a more stylish look and more convenient access and usability.

While mounting a flat screen TV seems like a simple task, there is a lot of thought that goes into it. A tape measure will be a useful tool during the process of mounting.

Television Size

The first thing that matters when you are mounting a TV is the actual size of the TV itself. This is usually easy to fissure out as people typically know which size TVs they buy, but if not, then measuring can be a quick solution.

Typical TV sizes usually include 32-inch, 42-inch, 50-inch, 55-inch, 60-inch, 65-inch, and so on. When mounting a TV based on the size, you need to measure from the center of the TV to the floor.

Distance of Viewing

Based on the size of the TV, you need to have a reasonable amount of room when it comes to viewing distance.

To calculate viewing distance for yourself, you should take the size of your TV and divide it by 0.55. This will give you the distance for viewing in inches.

For example, for a 55-inch TV, you would do 55/0.55 to get a viewing distance of 100 inches.

For quick reference, the optimal viewing for 42″ TVs is 76″, 65” TVs is 118”, and for 70” televisions, you’ll ideally want to be 127” away.

Viewing Angle

One other thing to take into consideration when mounting your TV and figuring out the height is the viewing angle.

This calculates your eye level from where you will be sitting compared to the TV.

The best viewing angle is 30 degrees or less.

Mounting Height

After figuring out all of these factors as suggested by a professional company like Omaha Handyman Service in Omaha, NE, you can figure out how high you should mount your TV.

All of these factors are important to take into consideration to have a healthy and safe viewing distance when it comes to mounting your TV.

Measured from the floor to the center of the TV, the following list describes how high you should typically have your TV mounted based on the size of the TV:

42-inch TV should be 56 inches from the floor
55-inch TV should be 61 inches from the floor
65-inch TV should be 65 inches from the floor
70-inch TV should be 67 inches from the floor
Since this can be a difficult process, you can always trust professionals to take care of the process. Professional Installation Services are a great way to get it done right the first time.

If you’re looking for a mounting package that will be secure and allow for the most flexibility, in angling and height setting, we can help.

Easy Deck Inspection and Deck Repair Tips

If you’ve thought to yourself maybe it’s time to check the deck, then it’s time. A well-built deck will last for decades. But a deck that’s rotting or missing fasteners, or that moves when you walk on it, may be dangerous. Decks built by inexperienced do-it-yourselfers, not inspected when they were built, or more than 15 years old (building codes were different back then!) are susceptible to serious problems. Every year, people are severely injured, even killed, when decks like these fall down. This has usually happened during parties when the deck was filled with guests.

Now for the good news. Most of the fixes are quick, inexpensive and easy. Home centers and lumberyards carry the tools and materials you’ll need. Or visit strongtie.com to find local stores that stock anchors, post bases and connectors.

In this article, we’ll show you the warning signs of a dangerous deck—and how to fix the problems. If you’re still not sure whether your deck is safe, have it inspected by an expert deck builder at Omaha Handyman Service, Think your deck may need repairs? Check out our professional deck building and deck repair services.

Problem 1: No lag screws in ledger board

The ledger board holds up the end of the deck that’s against the house. If the ledger isn’t well fastened, the deck can simply fall off the house. A building inspector we talked with said the most common problem with DIY decks is ledger boards not properly fastened to the house. For a strong connection, a ledger needs 1/2-in. x 3-in. lag screws (or lag bolts if you have access from the inside to fasten the washers and nuts) driven every 16 in. This ledger board was fastened mostly with nails instead of lag screws (and no washers).

Starting at one end of the ledger board, drill two 1/4-in. pilot holes. Offset the holes so the top isn’t aligned with the bottom hole. Then drive the lag screws (with washers) using a drill and an impact socket (you’ll need a socket adapter that fits in your drill). Don’t countersink the screws—that only weakens the ledger board.

Problem 2: Missing nails in joist hangers

Granted there are a lot of nail holes in a joist hanger—but they all need to be filled. Otherwise, the hangers can pull loose from the ledger board or rim joist. Deck builders sometimes drive a couple of nails into the hangers to hold them in place, then forget to add the rest later. This deck had only a single nail in some joist hangers. In other areas, it had the wrong nails. Joist hanger nails are the only nails acceptable. These short, fat, galvanized nails are specially designed to hold the hangers in place under heavy loads and resist corrosion from treated lumber. Joist hanger nails have thicker heads and a heavy galvanized coating.

Problem 3: Rotted Deck Support Posts

Deck posts that rest directly on footings soak up water and then they rot, especially deck support posts that aren’t pressure treated. As the post rots, it loses its strength and can’t support the deck’s weight. Newer decks keep the concrete footings a few inches above ground and use a special base bracket to keep the deck support posts dry. Replacing a rotted post is the best solution. Before removing the post, be sure you have everything you need for the replacement, including a wedge anchor.

Problem 4: Rotten Deck Posts, Brace the Deck

Clear grass or stone away from the bottom of the deck post. Prod along the bottom of the post with a screwdriver or an awl. If the wood is spongy or pieces easily peel away, you’ll need to replace the post. Start by nailing 2x4s or 2x6s together to use as temporary braces. Place scrap wood on the ground for a pad within 3 ft. of the post being replaced, then set a hydraulic jack over it. Cut the brace to size, set one end on the jack and place the other end under the rim joist. Slowly jack up the brace until it’s wedged tight. Be careful not to overdo it. You’re just bracing the deck, not raising it. If you hear the joist boards creak, then stop. Then place a second brace on the other side of the post (as seen in the photo). (If you don’t have jacks, you can rent them.) Or you can set your temporary braces directly on the pads and drive shims between the posts and the rim joist.

Mark the post location on the footing, then remove the post by cutting through the fasteners that tie it to the rim joist. Use a metal blade in a reciprocating saw (or knock out the post with a hammer). If there’s already a bolt sticking out of the footing, use it to install a new post base. If not, you’ll need to add a 3/8- by 4-in. wedge anchor. Do this by placing the post base at the marks where the old post sat, and then mark the center. Remove the post base and drill the center mark with a 3/8-in. masonry bit. Drill down 3 in., then blow the dust out of the hole.

Problem 5: Rotten Deck Support Posts, Install an Anchor and Base

Tap the anchor into the hole with a hammer (as seen in photo). Install the post base over the anchor. As you tighten the nut on the anchor, the clip expands and wedges tight against the hole’s walls to hold itself in place. The wedge anchor fastens the metal post base solidly to the footing.

Problem 6: Rotten Deck Posts, Install the New Post

Cut a treated post to fit between the post base and the top of the rim joist. Set the deck support post into place and tack it to the post base with 8d or 10d galvanized nails (as seen in photo). Place a level alongside the post. When it’s plumb (straight), tack it in place to the rim joist.

Problem 7: Wimpy post connections

Strengthen post connections with carriage bolts. Drill holes, knock the bolts through, then tighten a washer and nut on the other side.

Ideally, posts should sit directly under the beam or rim joist to support the deck. If the posts are fastened to the side of the beam or rim joist, like the one shown here, the weight is put on the fasteners that connect the post to the deck. This deck had only three nails in the post—a recipe for collapse. Nails alone aren’t strong enough for this job, no matter how many you use. For a strong connection, you need 1/2-in.-diameter galvanized carriage bolts.

Add two of these bolts by drilling 1/2- in. holes through the rim joist and post. An 8-in.-long 1/2-in. drill bit costs around $10. The length of the bolts depends on the size of your post and the thickness of the rim joist (add them and buy bolts at least 1 in. longer than your measurement). We used 8-in. bolts, which went through two 1-1/2- in. rim joists and a 3-1/2-in. post. Tap the bolts through with a hammer, then add a washer and nut on the other side.

Problem 8: Wobbly deck syndrome

If your deck gets a case of the shakes when you walk across it, there’s probably no reason for concern. Still, in some cases, the deck movement puts extra stress on the fasteners and connectors. Over time, the joists can pull away from the rim joist or ledger board and twist out of their vertical position, which weakens them. Fastening angle bracing under the deck will stiffen it and take out the sway. The braces are mostly hidden from view and let you walk on your deck without feeling like it’s going to fall down at any moment.

Run a treated 2×4 diagonally from corner to corner, under the deck. Drive two 16d galvanized nails through the brace into each joist. If a single board won’t span the distance, use two, overlapping the braces by at least two joists. Cut the bracing flush with the outside edge of the deck.

Problem 8: Missing ledger flashing

The area around the ledger board should be watertight. Even small leaks can lead to mold inside the walls of the house and, even worse, the house rim joist (which supports the ledger) will rot and the ledger will fall off. Stand or crawl under the deck and look at the ledger board. If you don’t see a metal or plastic lip over the top of the ledger board, add the flashing. Flashing was completely missing from this deck.

To add flashing, first remove the deck board that runs alongside the house. If the boards run diagonally, snap a chalk line 5-1/2 in. from the house, then set the blade in a circular saw to the depth of the decking boards and cut off the board ends. (Replace the cutouts at the end of the job with a 5-1/2-in.-wide board installed parallel to the house.)

Problem 9: Missing ledger flashing – Loosen the siding

Pry the siding away from the house and remove the deck board that’s over the ledger to clear the way for new flashing.

Problem 10: Missing ledger flashing – Insert the flashing

Slide the flashing behind the siding so the lip covers the top of the ledger. Reattach the siding.

If you have a brick or stucco house, you probably won’t see any flashing because the ledgers are often installed directly over brick or stucco.

We used vinyl flashing, but you can also use galvanized metal or aluminum flashing. At each joist location, make a small cut in the flashing lip with a utility knife so it’ll lie flat over the joists. The rest of the lip should fit over the top edge of the ledger board.

Problem 11 Missing ledger flashing – Seal the bottom

You should have flashing under the bottom edge of the ledger too. But since there’s no way to add it without removing the ledger board, run a bead of acrylic caulk along the bottom of the ledger board to seal out water.

Problem 12: Rickety railing posts

Loose railings won’t lead to your deck falling down, but you could tumble off your deck. Railing posts attached only with nails are bound to come loose, and no matter how many new nails you drive into them, you won’t solve the problem. You’ll need a 4×4 post anchor strong enough for deck rail. Instead, add carriage bolts. Measure the thickness of the post and rim joist, then buy 1/2-in.- diameter galvanized carriage bolts that length plus 1 in. Also, get a nut and washer for each. Drill two 1/2-in. holes through the post and rim joist. Offset the holes, keeping one about 1-1/2 in. from the top of the joist and the other the same distance from the bottom (make sure to avoid drilling where a joist abuts the rim joist). Tap the carriage bolts through the holes, then tighten the nuts until the bolt heads are set flush with the post.

Required Tools for this Project

Have the necessary tools for this DIY project lined up before you start—you’ll save time and frustration.

Tape measure
Circular saw
Socket/ratchet set
Socket adapter
Deep socket
Caulk gun
Adjustable wrench
Drill/driver, cordless
Impact driver
Drill bit set
Masonry drill bit
Hammer drill
Pry bar
Reciprocating saw
Safety glasses
Utility knife
You’ll also need a small hydraulic jack and gloves.

Required Materials for this Project

Avoid last-minute shopping trips by having all your materials ready ahead of time. Here’s a list.

Lag screws, 1/2-in. x 3-in.
Joist hanger nails
Treated deck post, 4×4 or larger
Metal post base
Wedge anchor, 3/8-in. x 4-in.
Carriage bolts, 1/2-in.
Flashing
Acrylic caulk

Top 5 Signs Your Siding May Need to Be Replaced

Your home’s siding is like its skin – It protects the delicate interior structure from the harsh outdoor conditions. Because your siding takes a beating from the elements, it can show signs of wear and tear if it’s old or if it hasn’t been properly maintained. Eventually, all siding needs to be replaced to keep the rest of your home protected. If you think your siding may need to be replaced, check out our professional siding replacement services.

Following are the top 5 signs your home’s siding needs to be replaced:

You Have High Heating & Cooling Bills
If you’ve noticed the slow creeping up of your heating and cooling bills, and rising energy prices aren’t the culprit, your siding could be to blame. Over time, siding can shift or develop spaces that cause air from the outdoors to leak in and outside air to sneak indoors. As a result, your heating and cooling systems need to work harder, meaning your bills go up. Replacing your siding with something newer can decrease your bills within the first season after installation.

You See Cracking or Warping
Your siding can be damaged by falling branches, animals, or heavy winds. If you notice cracked or warped pieces of siding, that means you’re not getting the best protection from your siding. Cracks and warped boards can take on water, leak air, and allow animals and pests to infiltrate your home’s interior, causing all sorts of problems. Getting your siding repaired or replaced by a professional siding company promptly is the best way to prevent further issues.

Your Interior Paint or Wallpaper Is Peeling
Though it isn’t an obvious connection for many homeowners, peeling wallpaper or paint inside a home means there’s something going on behind the walls. Often, that’s siding in ill repair allowing moisture to build up behind the siding. This moisture can lead to all sorts of interior problems – mold and mildew, sagging walls, or damaged drywall – and can spell expensive repairs if the source of the moisture isn’t corrected.

You Find Fungus, Mold, or Mildew
Fungus, mold, or mildew – either inside your home or on your home’s siding – means a moisture issue that needs correcting. These growths not only cause damage to your home, but they can cause health problems for you and your family. If your siding is the cause of your mold problem, it likely means replacement is necessary to correct a moisture problem.

You See Holes
Like cracking and warping, holes can happen for a variety of reasons. Sometimes, small holes can be repaired and the rest of your siding is none the worse for wear. But if you find multiple holes, or holes that appear to have been there for a while, you could be dealing with moisture leakage or pest infiltration. The best way to take care of these problems is to strip off all the siding and replace it.